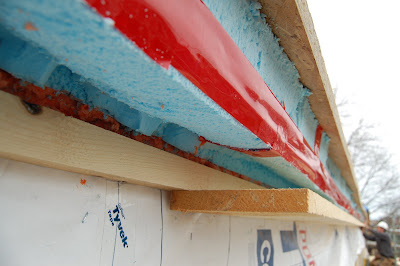

Jared taping up the ends of the rigid foam.

Nailer & sub soffit board installed

Foam void

Install sub fascia board


Make it square. (not square in the photo)
Once they complete this the whole way around the building, the next steps will be to roll out Ice & Water shield at the eves, riges & penetrations, install a drip edge, lay down roof underlayment and install shingles.

The renovation work makes me remember the time when my roof was devastated by a storm; the repair work lasts for a week due to the speed and quality of the job done. One thing that caught my attention was their use of the roof anchor to prevent themselves from falling, in which it added to their speed due to guaranteed safety. Also, having roof anchor points on my roof makes it easier for me to traverse and clean the roof gutter.
ReplyDeleteGreat description man. Thanks for your sharing. Most of us do not bother about the security of our home roofs which after sometime displays its images.
ReplyDeleteFoam Roof
BRAVO! This is what I call an excellent post. All details are intact, making it easy to read and understand all the written facts. With this informative blog, I’m sure that many roofers will be more enlightened.
ReplyDeleteSplendid job! You’re almost at it. A few more work and that roof will be done for good. However, installing shingles will definitely take most of your time. I do hope you have someone to work with. Lastly, why are you not wearing any gloves? You should wear one for your safety.
ReplyDeleteThis comment has been removed by a blog administrator.
ReplyDeleteIt seems like you did a lot of work in that project. I do hope that everything turned out well with the roof and that the shingles you chose to install lasts long.
ReplyDeleteAllyson Duguay
hi
ReplyDelete